Embedded Hardware & Software
Using TagConnect adapter for SWD interface
Some years ago in 8-bit times when I was AVR fan, I have been aware sleek, low-footprint TagConnect Pogo pin interface for Programming and Debuging the MCUs, initially Microchip's PIC series, which made me a bit jealous and highly motivated me in buying them. It has two footprints: legged and no-legs (-NL suffix). The bigger one has hooks for holding in place, which is for comfortable debugging.


The smaller footprint is great for fast in-system programming on your final product's assembly line. It is inly about 1 cm^2 large.

This is the footprint for its corresponding ICD cable-to-board connector:

As folks around know, I prefer Segger's J-Link over STLink, because it supports virtually unlimited breakpoints and is much faster overall, so I bought one and never looked back. That was the reaason I decided to push a bit further and create my own TagConnect J-Link adapter.

As you can see, the board contains selectable 1117-style 3.3V/0.3A LDO, as well as all JTAG pins placed conveniently on a header, which may be nice to have. Heck, you can even ignore the TagConnect and use the board as a PSU + debug interface.
Powering the target board externally
The board has now external power. To enable the power permanently, follow this procedure (probably Windows only):
- Connect J-Link to the PC via USB
- Start J-Link Commander (JLink.exe)
- Enter the “power on perm” command without quotes to enable target power by default.
Board available for sale
Revision 4 board is available now. It has resistor-programmable LDO (pre-programmed for 3.3 V operation) for external power, RJ12 and IDC sockets. You can buy it at my Tindie store.
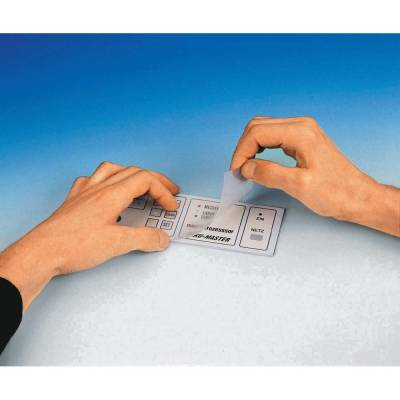
Adhesive sheets for front panel design
Some years ago I have found a good and reliable way for front panel design using multiple adhesive foils. For materials of my choice, see below. It goes like this:
- Use inkscape or similar vector based drawing tool and your measurement tools of choice to design the front panel.
- Print the panel on the plain paper. Cut the frame out. Check the printed outline with the original enclosure. Iterate until satisfied with your results.
- Store the panel's outline into separate layer for later use.
- Print the panel on opaque (non-transparent) adhesive foil of your choice.
- Print the panel's outline onto transparent protective sheet. My preference is slightly structured surface finish, which hides the manufacturing imperfections. Your preference may vary.
- Stick your panel to the surface
Preferred adhesive foils
My preferred items are Conrad's
- matte sheet #528870,
- textured sheet #529443,
- clear sheet for laser printers #530565,
- clear 160µm sheet for inkjets #529672,
- as well as white sheet for inkjets #529648.
UPDATE: Recently, I have found some alternative and cheaper self adhesive laser printer sheets from Lomond. They are sold by Agem in Slovakia:
A short checklist for STM32 Open Source developers
EDIT: Published in 2013.
Up until recent months, Open Source oriented developers developing for ST's' Cortex-M SoCs were faced with a tough choice: should they choose the development tools that exist today, but are Windows-centric? Let's be fair and admit that using Windows for any FLOSS development is like developing without arms and legs.
Fortunately, native open source OS solutions have started popping up lately, though they narrow down to GNU/Linux (mainly Ubuntu 12.04 or later), gcc toolchain, openocd, and a handful of scripts for make and linker. Another addition to the list is Eclipse IDE.
With these findings, I'm on the “me too” side of STM32 bandwagon.

The first thing to go after, in my point of view, seem to be Vedder's Get Started With STM32F4 on Ubuntu Linux about building modified summon ARM GCC toolchain. With minor modifications to the script, this works well with Ubuntu 12.04 LTS.
When you are ready to launch, USB CDC as software serial on STM32F4 is the way to go.
Books
The Definitive Guides

An issue with copying and pasting the code blindly is that it only scratches the surface, instead of understanding the core's internals. If you want to learn about ARM Cortex-M platform, my recommendations go after Joseph Yiu's The Definitive Guide to ARM Cortex-M3 and CortexM4 Processors, 3rd Edition and Cortex-M0/M0+ version here. These 800+ pages are worth the money invested. Both books are oriented at general Cortex-M programming.
Mastering STM32

If you are STM32 positive like me, then you may find even better reading with ST-specific internals: Mastering STM32. Carmine Noviello did a great job at explaining many implementation details and caveats. Although the book is HAL library oriented, STM32 users with SPL affinity like me should also read this book. In short, this is the best book about STM32 Cortex-M systems on chip so far.
Blog History
